Capturing and decoding vxlan encapsulated packets

In this short post we will look at capturing packets that are encapsulated with the VXLAN protocol and how to decode them with wireshark for troubleshooting and debugging purposes. This procedure is handy when you want to analyze network traffic on a logical switch or between logical switches.

In order to capture packets on ESXi we will use the pktcap-uw utility. Pktcap-uw is quite a versatile tool, allowing to capture at multiple points on the network stack and even trace packets through the stack. Further details on pktcap-uw can be found in VMware product documentation –here

The limitation with the current version of pktcap-uw is that we need to run 2 sets of commands to capture both egress and ingress. With that said lets get to it.. In this environment I will capture packets on vmnic4 on source and destination ESXi hosts.

To capture VXLAN encapsulated packets egressing uplink vmnic4 on the source host

pktcap-uw --uplink vmnic4 --dir 1 --stage 1 -o /tmp/vmnic4-tx.pcap

To capture VXLAN encapsulated packets ingressing uplink vmnic4 on the destination host

pktcap-uw --uplink vmnic4 --dir 0 --stage 0 -o /tmp/vmnic4-rx.pcap

If you have access to the ESXi host and want to look at the packet capture with the VXLAN headers you can use the tcpdump command like so,

tcpdump

This capture can further be imported into wireshark and the frames decoded. When the capture is first opened wireshark displays only the outer source and destination IP which are VXLAN endpoints. We need to map destination UDP port 8472 to the VXLAN protocol to see the inner frames

To do so, open the capture with Wireshark –> Analyze –> Decode As

vxlan_decode

Once decoded wireshark will display the inner source and destination IP address and inner protocol.

vxlan_decap

I hope you find this post helpful, until next time!!

Removing IP addresses from the NSX IP pool

I was recently involved in a NSX deployment where the ESX hosts (VTEPs) were not able to communicate with each other. The NSX manager UI showed that few ESX hosts in the cluster were not prepared even though the entire cluster was prepared. We quickly took a look at the ESX hosts and found that the VXLAN vmk interfaces were missing but the VIBs were still installed. Re-preparing these hosts failed with no IP addresses available in the VTEP IP pool.

To cut a long story short, We had to remove some IP addresses from the IP pool and apparently there is no way to do this from the NSX UI without deleting and re-creating the IP pool. Even with deleting and re-creating the IP pool, you can only provide a single set of contiguous IP addresses. Fortunately there is a Rest API method available to accomplish this.

So to remove an IP address from the pool we first need to find the pool-id. Using a Rest client run this GET request to get the pool-id

https:///api/2.0/services/ipam/pools/scope/globalroot-0

The output would list all the configured IP pools. We need to look at the objectId tag to get the pool-id. Once we have the pool-id we can query the pool to verify the start and end of the IP pool

https:///api/2.0/services/ipam/pools/ipaddresspool-1

To remove an IP address from this pool use the Delete method along with IP address like so,

https:///api/2.0/services/ipam/pool/ipaddresspool-1/ipaddresses/192.168.1.10

Note: With this method you can only remove IP addresses that have been allocated and not free addresses in the pool.

IGMP versions requirement for VXLAN logical networks

Recently we were working on an issue were VXLAN Transport Multicast traffic was not being passed on the upstream physical switches causing an outage for the virtual machines that were hosted on these virtual wires.

Some Background on the environment:

This was a vCNS 5.5 environment with VXLAN deployed in Multicast mode. This was quite a big environment with multiple virtual wires deployed and multiple virtual machines connected to these virtual wires.
Virtual Machines were not able to communicate because multicast traffic was not being passed on the physical switches.

Upon further investigation it was revealed that IGMPv3 join’s were being received by the physical switch and since the physical switch had IGMPv2 enabled it pruned and ignored the IGMPv3 joins. So to resolve the issue, IGMPv3 was enabled on the upstream switches and the ESX hosts were able to join their multicast groups and the virtual machines were reachable on the network.

Starting with ESX 5.5, the default IGMP version on the ESX host has been changed to v3. This option is configurable and can be reverted to IGMPv2 using the ESX advanced settings,

Configuration–>Advanced Settings–>Net–>Net.TcpipIGMPDefaultVersion

Hope this helps someone that run’s into a similar issue.

Unicast VXLAN:Integrating NSX and vCloud Director

One of challenges with implementing VXLAN is configuring Multicast on physical switches to support BUM traffic. With the release of NSX for vSphere, VXLAN can be deployed to work in Unicast mode with the help of the NSX controller. In this article we will look at deploying VXLAN with NSX and integrating vCloud Director to create logical networks.

This article assumes that vCloud Director is already installed. vCloud Director should be version 5.5.0 or higher

Deploying NSX Manager

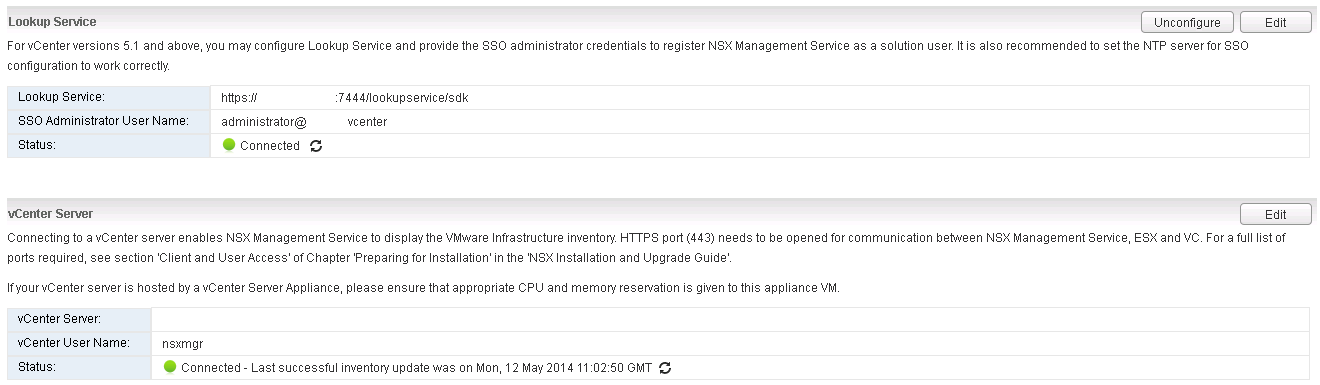
First download the NSX Manager and deploy the OVF image on the Management Cluster. The deploy OVF wizard will require IP address details for the NSX Manager.Once the NSX manager is deployed connect to the WebUI of the NSX manager to register NSX Manager with vCenter Server and the vCenter Lookup Service. Once NSX Manager is successfully registered with vCenter the Networking & Security tab is displayed in the Web Client. All NSX configuration will be done using the Web Client. Under the Network & Security plugin the NSX Manager should be listed.

1

Note: An important caveat here is to use a user account with administrator privileges to register vCenter, else the NSX Manager will not displayed in the Web Client.

Deploying the NSX Controller

The next step is to deploy the NSX controller. Under the NSX Controller Nodes section, Click the ‘+’ to add the first NSX controller. The NSX controller provides a control plane to distribute network information down to the ESX hosts. The Controller can be clustered by deploying additional controllers to support scale out architecture and high availability.

controller

Prepare ESX hosts for VXLAN

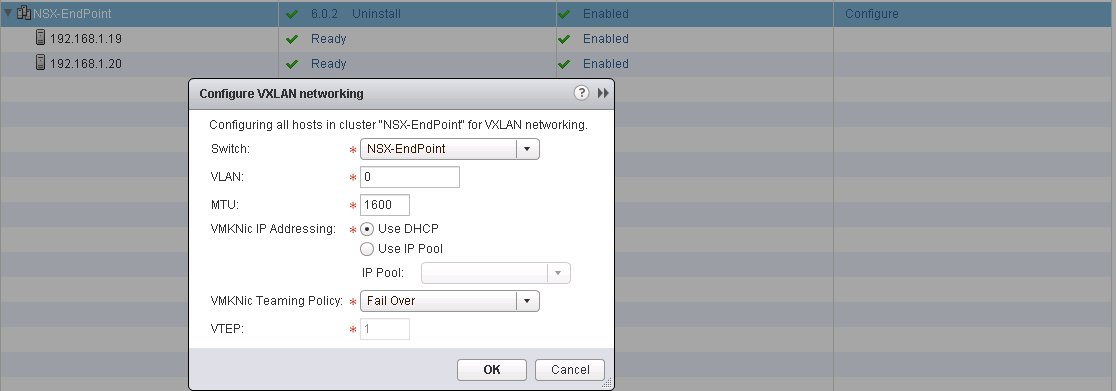
To start deploying logical networks the ESX hosts need to be prepared for VXLAN. Under Installation->Host Preparation, Click Install against the cluster that will be prepared. The installation process pushes VXLAN vibs to the ESX hosts and enables the Distributed Firewall.

vxlan

Once the ESX hosts go into ‘Ready’ status we can configure VXLAN. Select the Virtual Distributed Switch, if VXLAN traffic needs to be isolated in a VLAN enter the VLAN number. Default MTU of 1600 should suffice, Either an IP pool or DHCP can be used to assign IP addresses to the VTEP interface that gets created as part of the VXLAN configuration. Select the teaming policy for VTEP load balancing and high availability

vxlan

Logical Network Preparation

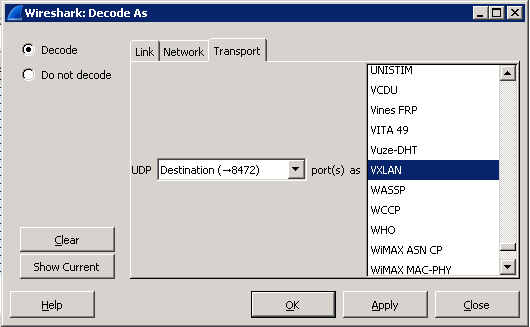
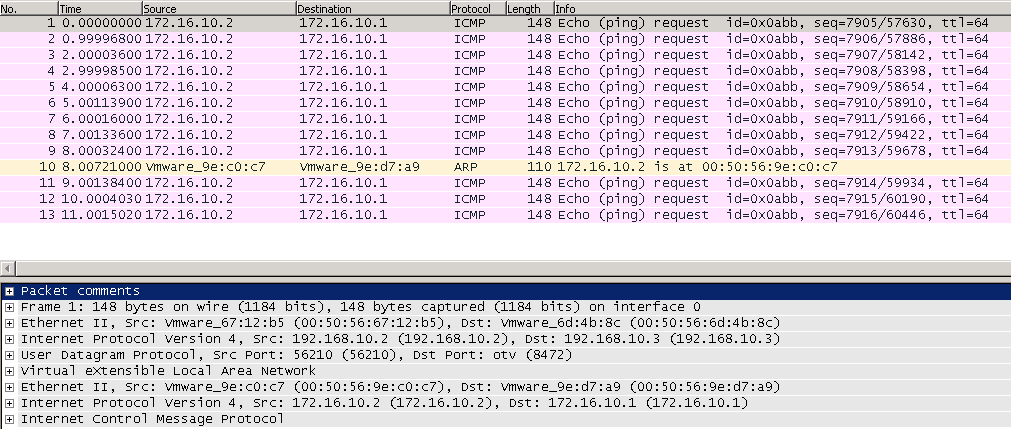
Once the ESX hosts are prepared and ready the transport zone and Segment ID needs to be created. Under Logical Network Preparation->Segment ID enter the Segment ID pool. We do not need Multicast IP addresses since we will use Unicast as the Control Plane mode.
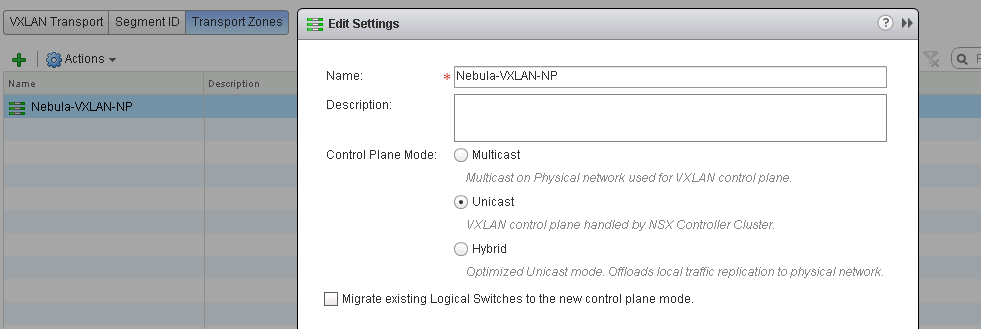
Typically a Transport zone and the Control Plan mode is also defined at this stage but since we are integrating vCloud Director we will allow vCloud Director to create the the transport zone.

vCloud Director Configuration

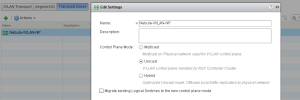
At this stage there should be a VXLAN Network pool created by default in vCloud Director, this should be in error state since VXLAN was not per-configured. Right Click the network pool and choose repair to recreate the transport zone. Once complete there should now be a transport zone created under the logical network preparation tab. Edit the transport zone and change the Control Plane mode to Unicast.

unicast

Consuming Logical Networks

The network pool that was created can now be assigned to a vCloud Virtual Data Center. To start consuming VXLAN logical networks an Edge Gateway and a Routed network needs be deployed within the organization. When the Routed network is created a logical switch with the segment ID is created as a port group in vCenter. Virtual machines can now be deployed and connected to the Routed network and use VXLAN as the underlying transport.

I hope you found this article useful. Questions or comments are welcome!